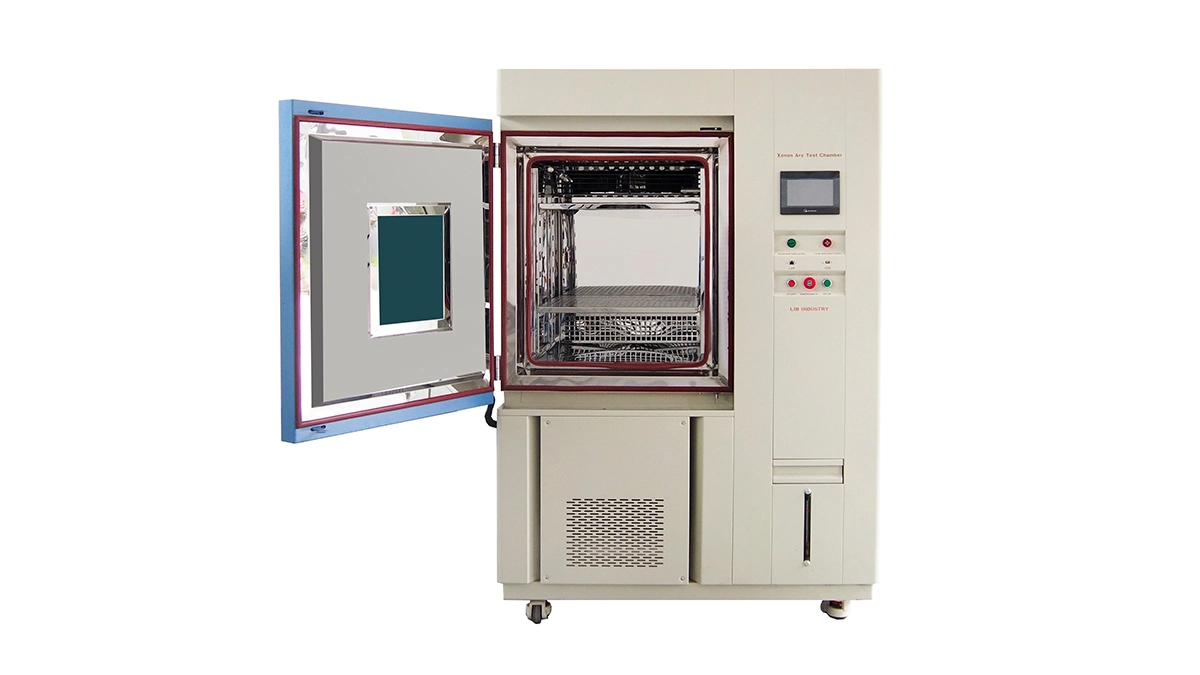
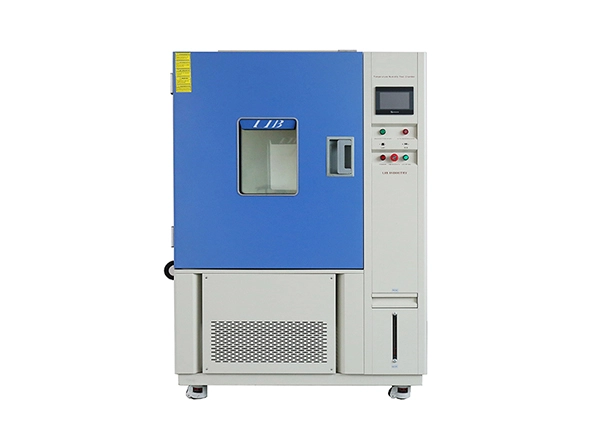
Choose a 2 zone thermal shock chamber when your test requires extremely rapid transitions between hot and cold conditions and the specimen can be mechanically transferred. Choose a 3 zone thermal shock chamber when the sample should remain stationary, especially for heavy, fragile, or highly instrumented products. Both configurations can support thermal shock methods such as IEC 60068-2-14 and MIL-STD procedures, depending on the chamber specification and test profile. The most important selection factors are transfer method, transition time, sample size and weight, fixture requirements, thermal recovery, and the exact test standard—not simply whether the chamber has two or three zones.
Thermal shock testing evaluates how products withstand sudden changes between extreme temperatures. Unlike conventional thermal cycling, the objective is to create a rapid temperature transition that can produce thermal gradients and mechanical stress inside the specimen.
Typical applications include semiconductor packages, PCBs, connectors, automotive electronics, battery components, aerospace equipment, optical products, plastics, and composite materials.
Sudden expansion and contraction can reveal solder cracking, delamination, seal failure, material deformation, connector damage, and other weaknesses that may not appear during gradual temperature cycling.
The key difference between the two chamber configurations is how this thermal stress is created.
A 2 zone thermal shock chamber uses separate hot and cold zones. A basket transfers the specimen between them, creating a very rapid temperature transition. LIB states that applicable configurations can transfer the sample between zones in approximately three seconds.
A 3 zone thermal shock chamber adds a dedicated test zone between the hot and cold zones. The specimen remains in the test area while hot or cold air is introduced through controlled dampers. This design can be advantageous when sample movement is undesirable.
The exact conditions depend on the applicable standard and product qualification plan.
Standard / Method | Temperature | Humidity | Cycle / Duration | Spray / Pressure |
IEC 60068-2-14 | Defined high/low temperatures | N/A | Specified thermal cycles | N/A |
MIL-STD-810 Method 503 | Procedure dependent | N/A | Defined thermal shock cycles | N/A |
JESD22 | Semiconductor-specific | N/A | Defined high/low cycles | N/A |
ISO 16750-4 | Automotive climatic conditions | Application dependent | Cycling/shock profiles | Application dependent |
IEC 61215 | Defined module temperatures | Application dependent | Thermal cycling sequence | N/A |
ASTM D4169 | Package conditioning | Application dependent | Procedure specific | May include additional stresses |
LIB's Temperature Shock Test Chamber range includes configurations for standards such as IEC 61215, IEC 61646, IEC 61108, IEC 62688, ASTM D4169-16, and MIL-STD methods. Exact compliance should be confirmed against the current standard and equipment specification.
LIB's listed thermal shock models cover approximately 22 L to 505 L, with temperature capability reaching about +220°C to -75°C, depending on configuration.
Parameter | 2 Zone Thermal Shock Chamber | 3 Zone Thermal Shock Chamber |
Temperature range | Approx. -75°C to +220°C, model dependent | Approx. -75°C to +220°C, model dependent |
Humidity range | Usually not the primary function | Usually not the primary function |
Chamber volume | Approx. 22–505 L on listed models | Configuration dependent |
Ramp rate / transition | Very rapid physical transfer | Rapid airflow switching |
Airflow | Separate hot/cold circulation | Hot/cold airflow directed into test zone |
Sample heat load | Important for temperature recovery | Important for maintaining test-zone conditions |
Safety configuration | Temperature, refrigeration, electrical and transfer protection | Temperature, refrigeration, electrical and damper protection |
Applicable standards | IEC, MIL-STD, JESD and application-specific methods | IEC, MIL-STD, JESD and application-specific methods |
The main difference is the specimen transfer mechanism.
In a 2 zone system, hot and cold zones are maintained independently. The basket moves the specimen between them, allowing a very short transition time. This makes the configuration attractive when severe thermal shock is the primary requirement.
In a 3 zone system, the specimen remains in a central test zone. Hot or cold air is introduced through the airflow system rather than moving the sample. LIB describes this as a static-damper configuration.
Therefore, 2 zone vs 3 zone thermal shock chamber is not simply a choice between “faster” and “slower.” It is a decision about how the specimen should experience the thermal transition.
Two chambers may reach the same high and low temperatures but produce very different thermal shock profiles. Transfer time, airflow, recovery, and test-zone conditions should also be compared.
A moving basket may not be suitable for fragile specimens, complex fixtures, or samples connected to extensive monitoring equipment. In such cases, a stationary three-zone configuration can be more practical.
A specimen may fit inside the chamber but exceed the basket or fixture capacity. Weight, dimensions, center of gravity, and mounting requirements should be included during selection.
Large metal assemblies and battery modules can absorb substantial thermal energy. This can affect recovery and the ability of the chamber to maintain the required condition.
Thermocouples, power cables, BMS connections, and data acquisition systems may require special ports or fixtures. These requirements should be identified before ordering.
A three-zone system provides a stationary test area, but actual performance still depends on refrigeration capacity, airflow design, sensors, dampers, and controls. Zone count alone does not determine test quality.
The appropriate configuration depends on the specimen and test objective.
Benchtop: Suitable for small components and laboratory specimens requiring a compact thermal shock solution.
Reach-In: Better for larger products and fixtures that need greater working space.
Walk-In: Appropriate for large assemblies, battery systems, or batch testing beyond standard chamber dimensions.
Thermal Shock: The primary choice for sudden hot-to-cold or cold-to-hot transitions. LIB offers both basket-transfer and static-damper configurations.
Salt Spray: Suitable when corrosion is the primary environmental concern.
IP: Appropriate for dust and water ingress testing.
Special Custom Chamber: Recommended when thermal shock must be combined with battery safety, humidity, vibration, pressure, or other special conditions.
LIB's Thermal Chambers category brings together Thermal Shock Chambers, Temperature Cycle Chambers, Thermal Cycling Equipment, Rapid Temperature Change Chambers, and other thermal testing configurations. This makes the category useful when the required test profile has been defined but the exact chamber configuration has not yet been selected.
For a 2 zone thermal shock chamber, the LIB Thermal Shock Chamber range includes configurations using separate hot and cold zones with basket transfer. For applications requiring a stationary specimen, LIB also provides three-zone static-damper configurations.
The selection can also depend on the industry. LIB's Battery Technology solutions address environmental testing requirements for battery cells, modules, and related components, where rapid temperature transitions can be used to evaluate thermal and structural reliability.
For further technical comparison, LIB's blog article What Is the Difference Between Thermal Cycling Test and Thermal Shock Test? explains the difference between gradual thermal cycling and sudden thermal shock and helps clarify which testing approach is appropriate for different qualification objectives.
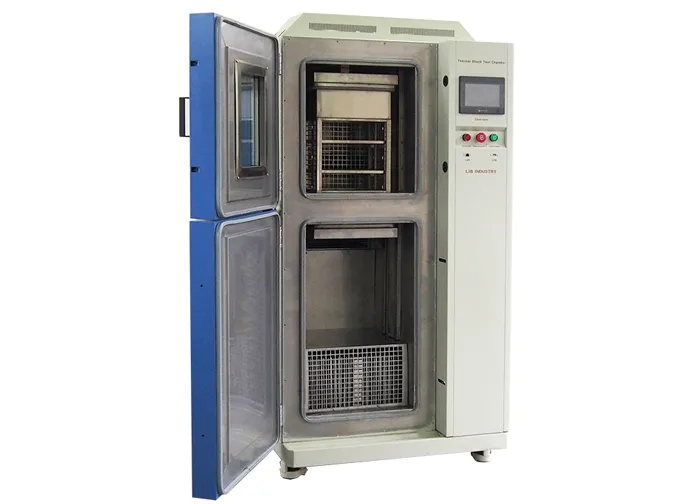
A 2 zone thermal shock chamber moves the specimen between separate hot and cold zones. A 3 zone thermal shock chamber keeps the specimen stationary in a central test zone while hot or cold airflow is introduced.
Generally, yes. The physical transfer of the specimen between independently conditioned zones can create an extremely rapid temperature transition. LIB specifies approximately three-second transfer for applicable configurations.
Choose a three-zone configuration when the specimen is heavy, fragile, movement-sensitive, or connected to complex monitoring equipment that makes physical transfer impractical.
Consider specimen dimensions, weight, fixtures, instrumentation, airflow clearance, and required loading capacity. LIB's listed thermal shock models range from approximately 22 L to 505 L.
Potentially. Compliance depends on the exact chamber configuration and test method. The required temperature limits, transition time, dwell conditions, cycles, and recovery requirements should be confirmed before selection.
Specify temperature limits, required transition time, sample dimensions and weight, cycle count, dwell time, fixture requirements, monitoring equipment, applicable standards, cable ports, safety requirements, and whether the specimen can be moved during testing.

 English
 русский
 français
 العربية
 Deutsch
 Español
 한국어
한국어 italiano
 tiếng việt
 ไทย
ไทย Indonesia